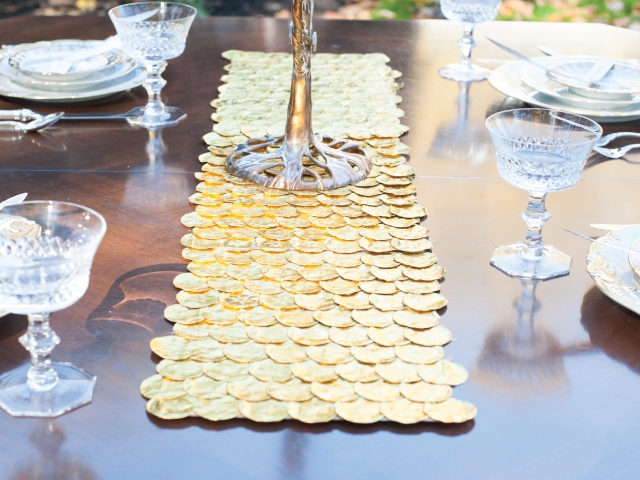
I am so excited Hanukkah and Thanksgiving decided to team up this year and give us the ultimate holiday: Thanksgivukkah! And since this holiday will not happen again for another 70,000 years, we decided to really do it up. We set up a beautiful table inspired by the traditions of both holidays, and gave you some DIY’s so you can bring this Thanksgivukkah spirit to your own home.
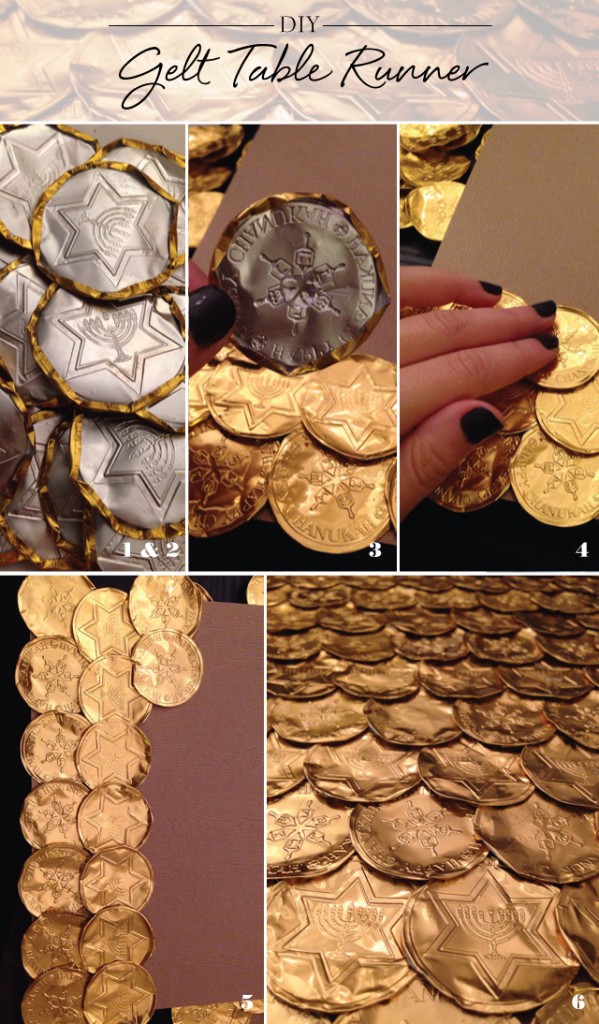
DIY STEPS FOR HANUKKAH GELT TABLE RUNNER
1.& 2. Staple together cardstock to create a base. We used 3 pieces of 11×14 cardstock, but you can customize the size of the paper and the length of the base for your own table. Carefully unwrap all gelt – you will need both wrapper pieces intact.
The Nosher celebrates the traditions and recipes that have brought Jews together for centuries. Donate today to keep The Nosher's stories and recipes accessible to all.
3.Fold down all edges flat against the underside [silver side] of the wrapper.
4. Separate the designs into two piles, matching like with like. Using pieces from one pile, lay down a row of wrappers from edge to edge of cardstock. With a hot glue gun, attach the row to cardstock. Lay a second row over the first using pieces from the other pile.
5.Continue to scallop the rows, alternating designs.
6. Place along center of table, and voila! You have your very own gelt table runner.
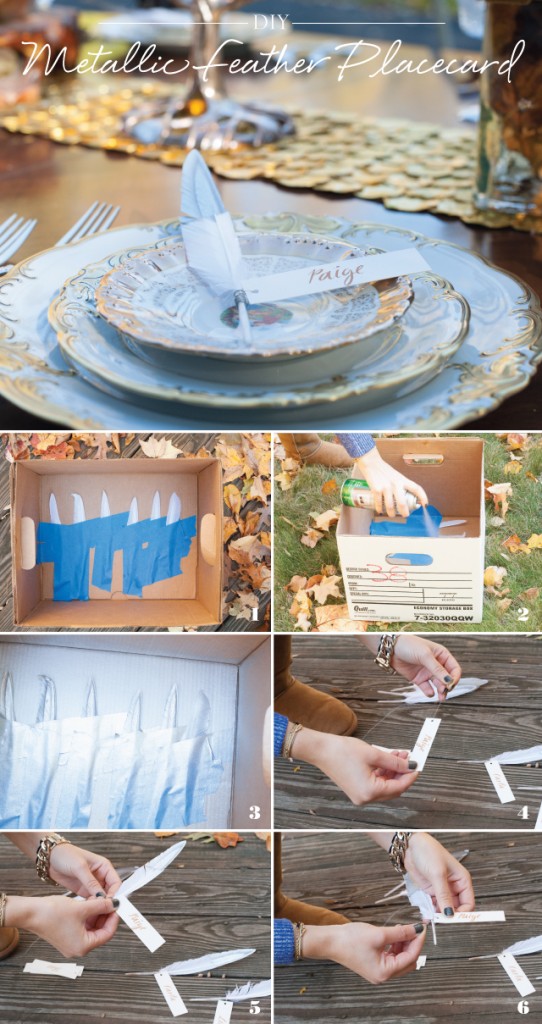
DIY STEPS FOR METALLIC FEATHER PLACE CARDS
1.Lay feathers out along bottom of a cardboard box. Using painter’s tape, cover about 2/3 of each feather completely. Tape just below the exposed feather tip at an angle for an artistic flair.
2. Coat the exposed tips of the feathers with metallic spray paint.
3. Allow to dry fully before gently peeling off painters tape.
4. Thread name cards* with craft wire, cut into approximately 6 inch pieces.
5.Align name card at base of feather.
6. Wrap entire length of wire around base to secure name card to feather, then place atop the dish or plate at each setting.
*We printed our name cards, but you can write guests’ names on cardstock of any size.


